Hiking Gibraltar Rock – Ice Age Trail

Pinhole photography from the Gibraltar Rock trail near Lodi, Wisconsin.

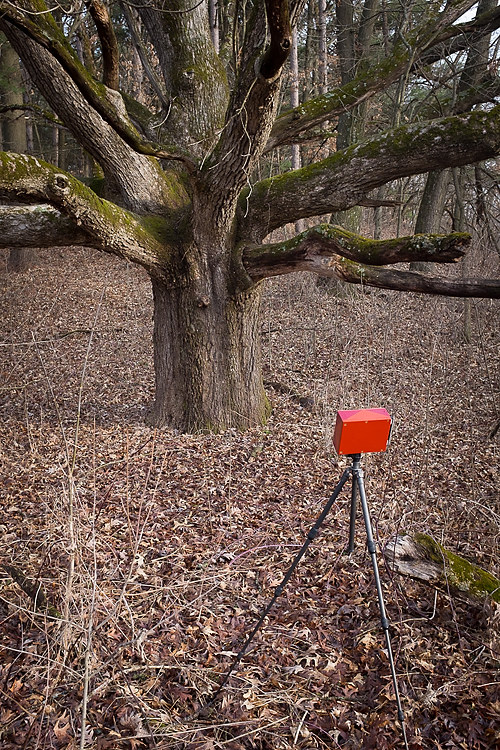
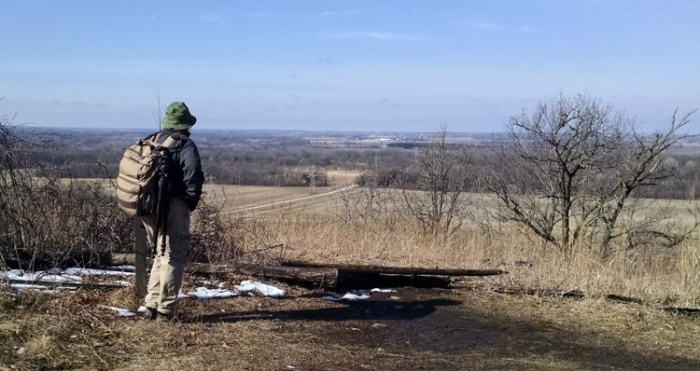
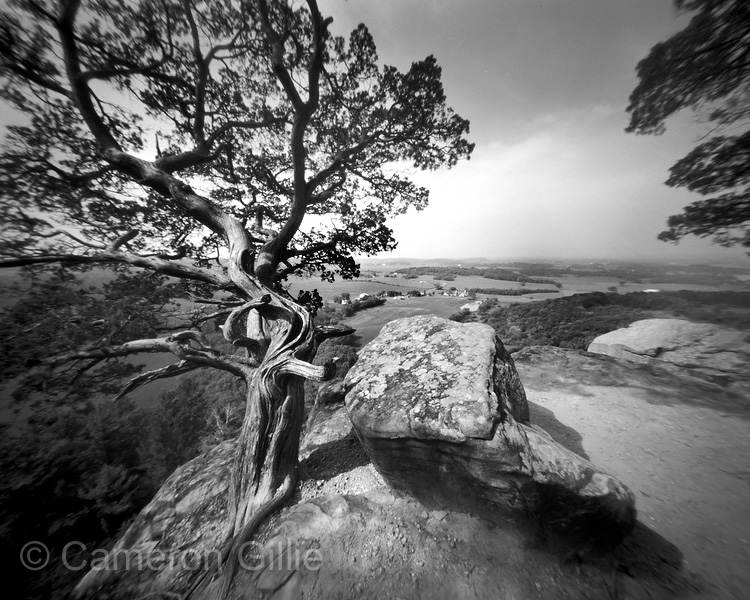
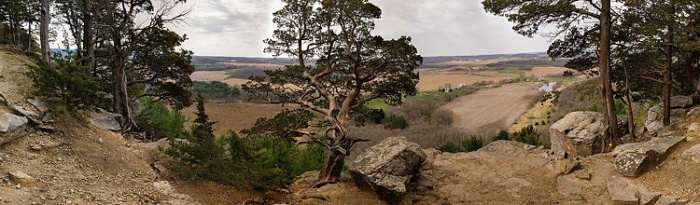
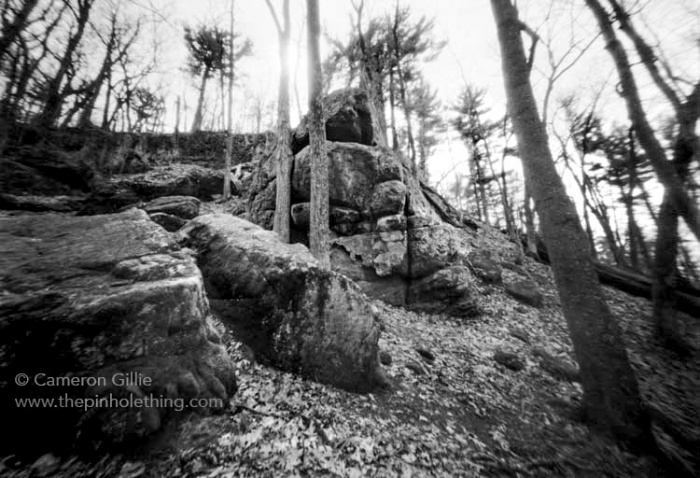
Hiking Gibraltar Rock on the Ice Age Trail is a pleasant surprise to most everyone who arrives at the top of the hike. I overheard a backpacker at the top of Gibraltar say “I didn’t know there was anything like THIS in Wisconsin.” That’s the same thing I thought several years ago when I reached the top. The above pinhole photograph shows off the view.

It’s also just a short drive from Madison and is one of the best hikes in Wisconsin.

hikers on top of Gibraltar Rock
Hikers take a break on top of Gibraltar Rock.

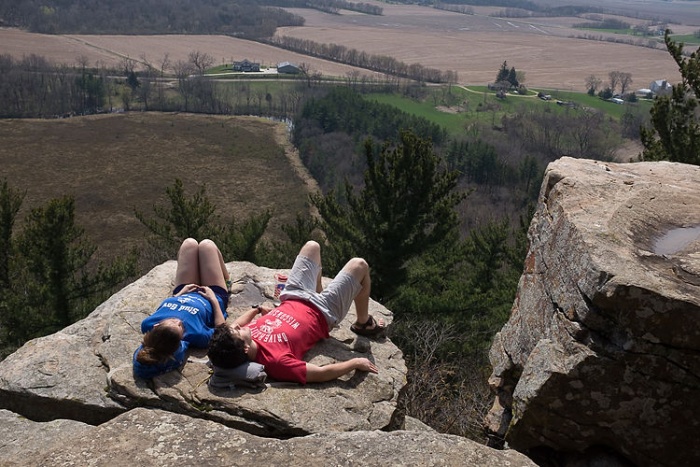
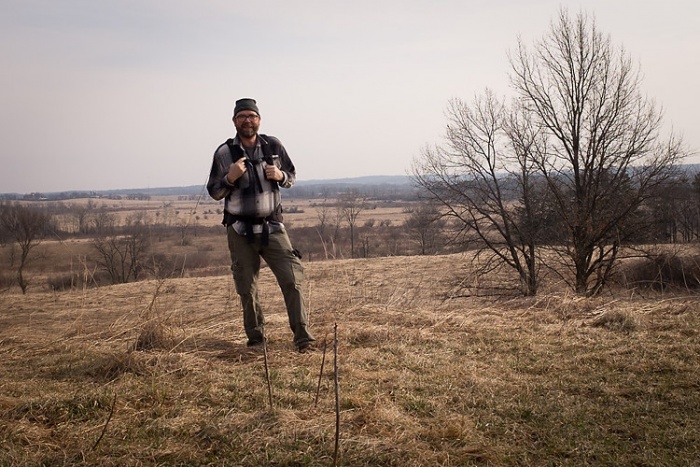
Views from a two hundred foot high cliff offer hikers a vista for miles across the beautiful Wisconsin landscape. Blue Mound State Park and Devil’s Lake State Park can be seen in the distance. Gibraltar Rock offers spectacular views like Devil’s Lake State park, but without the crowds. This lesser known park has much fewer visitors so on a weekday you might even have the place to yourself.

The trail to the top of Gibraltar Rock is a fairly easy short hike from the east parking lot. It’s also not nearly as arduous of a climb as the bluff in Devil’s Lake State Park.

You can extend the hike by walking to the top from the east parking lot and then back down to the west parking lot and return back for a total of 3.4 miles round trip. The additional scenery going down the west side makes both sides worthwhile.

taking a break from hiking the ice age trail.
Nazan and I take in the view from Gibraltar Rock.

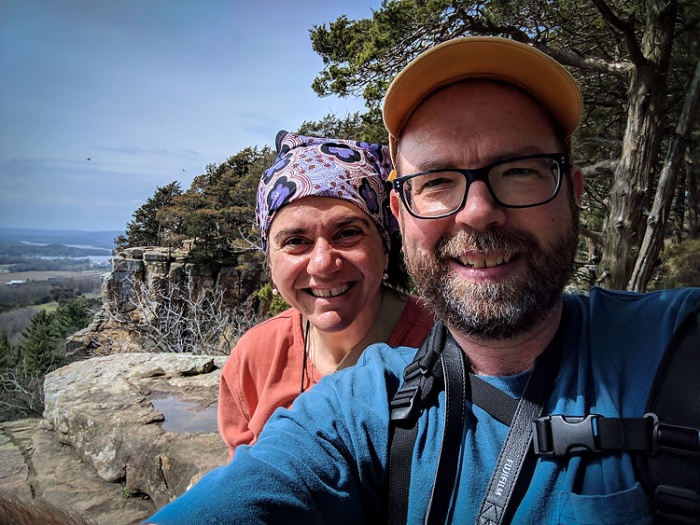
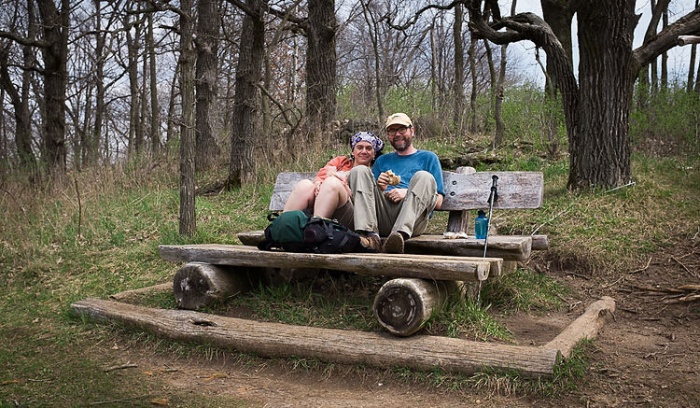
Nazan and I combined the Gibraltar Rock hike with another section of the Ice Age Trail connecting Gibraltar Rock to the Merrimac Ferry on Lake Wisconsin for a total of 4.8 miles. I used a bike shuttle to get back to the Merrimac Ferry after leaving our car in the west parking lot of Gibraltar where we ended our hike. That way we could enjoy a one way hike from north to south without backtracking. The bike ride between the west parking lot and the Merrimac ferry is a short 2.4 miles on 188 and County Road V. It was an okay ride in April, but It might be more dangerous biking with busy summer weekend traffic.

Rock formations on the hike up Gibraltar Rock
A pinhole photograph from the hike up Gibraltar Rock.

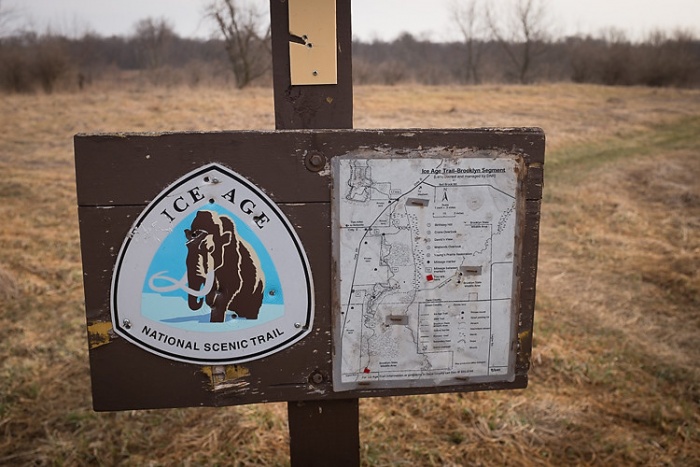
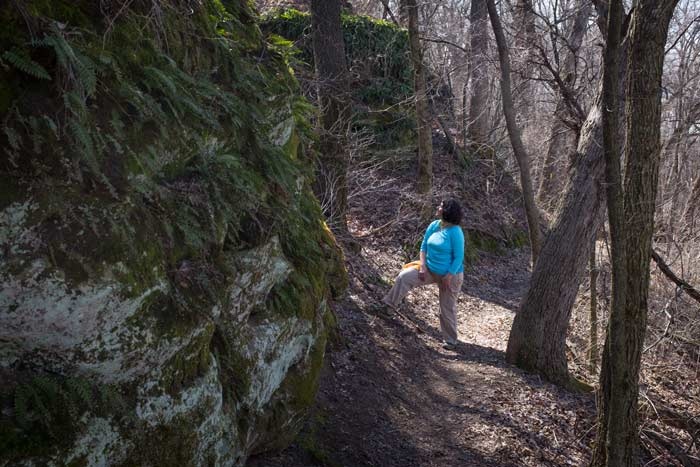
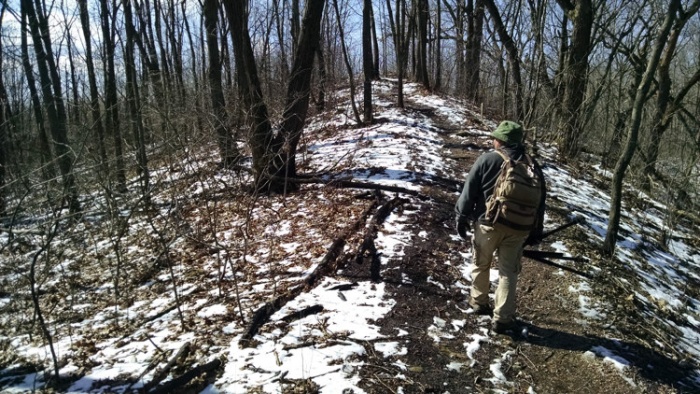
There is a short 1 mile road walk connecting the two sections to each other but we really enjoyed both segments making it almost a full day hike. The Ice Age Trail between Gibraltar and the Merrimac Ferry is much less used, but is still breathtaking. It climbs up and follows a ridge with amazing views of Lake Wisconsin. There is parking on both ends of the trail. Several well placed benches at overlooks are a great place to rest and have a snack. It’s well worth combining this trail with the Gibraltar segment for a longer full day hike.

The mother of all trail benches at the top of the Merrimac segment, complete with a foot rest to recline and take in the view from the top of the ridge.

*After the Hike*

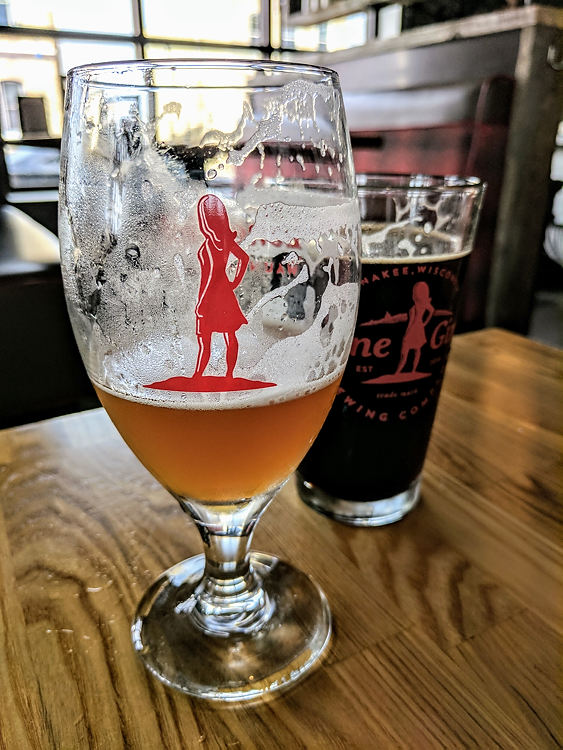
Beers- Reward yourself with a beer at Lone Girl Brewing in Waunakee after the hike. Lone Girl Brewing is worth making a road trip just by itself! It’s a good stopping off point for a beer on your way back to Madison. A perfect way to end an awesome hike.

Breakfast/lunch- Lucy’s Family Restaurant in Lodi offers breakfast all day. Nothing hits the spot like having a home cooked breakfast after a morning hike.

Coffee shop- Downtown Coffee Grounds is a fantastic Mom and Pop coffee shop in Lodi. The home cooked scones are delicious if you want to stop for a morning bite to eat on the way to Gibraltar or stopping off after.

Lone Girl Brewing has some of the best beer in Dane County.

Brooklyn Wildlife Area Hike – The Ice Age Trail

a pinhole photograph of An old oak tree on the old ice age trail

I found this stately oak tree while on a hike in the Brooklyn Wildlife Area, an awesome segment of the Ice Age Trail. This photo also is a great example to show just how crazy wide angle a pinhole camera can be. It’s what I really love about pinhole. The below digital photograph shows how close the camera is to the tree. The second I hiked around this corner of the trail and saw the tree I knew this was going to be a pinhole!

a pinhole camera taking a photograph of a tree
To give an idea of just how crazy wide a pinhole camera can be this is the camera where I took the above photo.

I’ve seen the Brooklyn Wildlife Area on Google maps but had never heard anything about the place. When I saw the Ice Age Trail makes it’s way through the refuge I thought I’d have to go check it out someday. I’m glad I finally did.

The route to the right is the Ice Age Trail, the route to the left is the biking shuttle route. All four parking lots are marked with the blue pins. 

It’s a hidden gem of a hike, compete with some hilly stretches, open meadows, wooded areas and even a scenic overlook that you can see for miles. It’s about a 3.5 mile to hike from the south parking lot on Hughes Road to the north parking lot on County Road DD. For a longer 6.5 mile hike start at Hughs Road and go all the way to the far northern parking lot on Frenchtown Road.

I was able to do a point A to point B hike by myself using my bike to shuttle myself to the car. The first time I went I parked my car at the north County Road DD parking lot and rode on County Road DD for 2.8 miles to the southern parking lot on Hughes Road to start the hike. Locked my bike at the starting point and hiked back to the car. This worked great, I’m going to do this more often. I’ve always disliked doing out and back hikes. Half the hike is seeing stuff on the way back you just walked by! Just be careful on County Road DD. It’s a narrow fairly busy road. Next time I’ll get an earlier start so I beat morning traffic.

ice age trail sign
The Ice Age Trail is an awesome hike through Brooklyn Wildlife Area.

From the south the hike starts out in typical wooded area and comes to lots of hilly glacial moraine  in the middle of the hike. The trail follows a ridge running north and south and comes to an open hill with a great view for miles around. These changes of scenery keeping the hike entertaining.

If you wanted to do a shorter hike strait to the good stuff in the middle like the overlook, just park at the middle parking lot on County Road DD. From there the overlook and the middle hilly portions of the trail are a very short distance.

hiker on the ice age trail.
The view from the overlook halfway through the hike.

The trail does continue through to the farthest northern part of the Brooklyn Wildlife Refuge, but there is no parking lot there for your car and a narrow road. Not a good place to park. The Ice Age Trail even continues on outside of the refuge on another ridge running north.

Hiking the Ice Age Trail.
The very northern face of the trail near Frenchtown Road has some beautiful rock outcroppings.

My Wife and I hiked the entire Brooklyn Wildlife area hike plus the Ice Age Trail running north to Frenchtown Road parking lot on a later date. So I did the bike shuttle from the Frenchtown Road parking to the southernmost parking lot on Hughes Road. From there we walked the entire 6 miles north to the car. It made for a great day trip. The northern section follows some high hills with great views of the surrounding area. It’s worth walking the two portions together if you have the time to make it a longer day.

my bike that I used to get back to the trailhead of the Brooklyn Wildlife Area hike
A new technique or me in hiking since getting a roof rack for my car- using your bike to shuttle back to the other end of the trail instead of doing an out and back hike.

Kettle Moraine Bald Bluff Hike – Ice Age Trail

An erratic rock known as the stone elephant on a hillside

The Kettle Moraine Bald Bluff Trail is some awesome hiking only about an hour from Madison. So often we overlook exploring the places close to home. I had only hiked the Kettle Moraine once and Mike Murray of North Sand Photography had never hiked there so we figured it was time we did. We spent a Sunday morning leisurely walking a short section of the Ice Age Trail between the Bald Bluff Trail parking lot and the Elephant Stone- an erratic left behind after the glaciers melted. (above photo)

Ice Age Trail

One of the purposes of Ice Age Trail is to feature all kinds of interesting glacial geology. That same topography makes for perfect hiking. Doing it on the last official day of winter with no leaves on the trees was an excellent time to go. It allows you to see all the interesting glacial topography along the trail better.

The entire trip was about three miles so it was an easy short hike to do in the morning and head into Palmyra for lunch. It’s a good workout though hiking up and down the glacial moraine.

The Kettle Moraine Bald Bluff Nature Trail overlook.
The Bald Bluff Nature Trail in Kettle Moraine State Forest

The highest point of the trail is very early on in the hike, the top of Bald Bluff. From the overlook you can really envision how the glaciers  gouged out the valley below as they traveled south stopping right where you are standing. The ridge running to the southwest curving slightly back north in the distance is the terminal moraine bulldozed up by the glaciers southern advance. The valley floor is very flat where the glaciers scraped the earth. At least it looks nearly flat from where you are standing. The hill is about 200 feet above the road you came in on and the parking lot.

Stone Elephant

a sign pointing to the Stoned Elephant
The Bald Bluff Nature Trail in Kettle Moraine State Forest

After taking in that view from Bald Bluff you continue on north on the Ice Age Trail. The Stone Elephant is only about 1.5 miles down the trail. It’s not Mount Rushmore, but it is pretty interesting and is a nice destination to have a snack on the park bench before heading back. Or explore further. Next time I’d like to do that or bring two cars to set up a shuttle so we can do a point to point hike rather than an out and back. It would be easy to keep on hiking to Tamarack Road about another mile and half up the trail to another parked car rather than returning to where you started.

hiking the ice age trail.
The Bald Bluff Nature Trail in Kettle Moraine State Forest, part of the Ice Age Trail, has a lot of interesting glacial geology.

It maybe takes a little creativity to see an elephant in the rock. I took a pinhole photograph from the angle I believe it’s supposed to look like an elephant. (top photo in this post) I could be wrong. But what I think IS actually amazing about this rock is to think this enormous boulder was carried here by a glacier from some point up north. Often these erratic stones were carried hundreds of miles from it’s original resting place. As the glaciers melted they left behind the debris they were carrying with them.

Getting there

Start the hike at the Bald Bluff Nature Trail trailhead a few miles south of Palmyra. There is a nice gravel parking lot and a historical brochure about the area around the Bald Bluff. Abraham Lincoln even slept here!!!!! No really, in his days serving in the army he camped near Bald Bluff.

Taking a selfie on the Kettle Moraine Bald Bluff Hiking Trail.
Mike Murray, left, and myself on a late winter hike scouting locations. And that would also be my hiking pole in the photo. I’m not the greatest at taking selfies!

Snow Day at Pope Farm Conservancy

A rock fence at the Pope Farm Conservancy in Middleton.

Pope Farm Conservancy

Being it snowed today I decided to take a snow day today at Pope Farm Conservancy and take some snow photos at the park in Middleton. A spontaneous decision I made early as the sun rose at the coffee shop today.

As I trudged through the snow for a couple miles taking photos I realized I should have brought my cross-country skis. I didn’t think it had snowed that much, but it would have been great skiing. It know it was pretty lousy walking in the 6 inches of snow. I got back to my car and was temporarily stuck in the snow and then had to help another car that was stuck in the driveway before I could head home.

A rock fence at the Pope Farm Conservancy in Middleton.

Layer with Photoshop

Once home I got sucked into trying out my layering techniques on the photos. I thought the snow would probably lend itself well to layering. It’s one of those things that it’s easy to get sucked into and wind up spending the rest of the day on it.  You basically take a bunch of other photographs of various textures and layer them on top of the original photo to get a rustic textured look. I have a folder of photos for this; pictures of concrete, rusty metal and flaking paint.

As a former photojournalist there was a day that I would never have imagined myself doing this much with photoshop. For ethical reasons newspapers strictly prohibit it’s photographers from pretty much any Photoshop altering of photos. But the art world has a different set of rules.

It can be a nice effect for fine art. I’m still not very skilled at this, but it’s fun to play with. I’m not sure if I pulled it off or not? A friend of mine is great at this technique. We got to know each other at art fairs around the Midwest. Jamie Heiden is the master of layering in Photoshop! Her work is certainly part of the reason I changed my mind about Photoshopping images.

The Pope Farm Conservancy in Middleton.

Light Painted Vintage Cameras

light painted vintage cameras

Collecting vintage cameras has become a hobby of sorts for me. Old point and shoot cameras from the middle part of the last century are generally plentiful and cheap. Perfect to collect on a photographers budget!

They also make great subjects for light painting. 

They can be easily found on eBay and at garage sales. When searching for vintage cameras on eBay try searching for “Bakelite camera” or “art deco camera”, those are my favorite searches.

Marketing Cameras

What I love about cameras from the 30’s, 40’s and 50’s is camera companies truly used the esthetic design of the camera to market the cameras. All their cameras did about the same thing, you pointed them at something and clicked a button. It took a photo at about 1/60 of a second at roughly F11. Good enough for an outdoor exposure. So to stand out from the crowd the camera manufactures started using design to help sell their newest cameras. Cameras today are just the same old boring black or silver and pretty much look the same.

A simple studio setut for light painting vintage cameras. light painting with a flashlight vs. a full studio lighting setup certainly saves space in your studio!
A simple studio setup for light painting vintage cameras. light painting with a flashlight vs. a full studio lighting setup certainly saves space in your studio!

The Brownie in the middle of this photo was a 1930’s brownie that was designed

by Walter Dorwin Teague for Kodak. Those brownies have become known as the “Art Deco Brownie” to collectors. They came in many colors. Because they are really popular with collectors I can only afford the less expensive brown Art Deco Brownie. I think I paid close to 100 dollars on that one; it’s the most expensive camera in my collection.

Most vintage cameras go for 10 to 20 dollars. A red Art Deco Walter Teague can fetch over a 1000 dollars at auction. Not bad for a camera that was only a couple of bucks at the time.

My fantasy is to find a red Art Deco Brownie someday at a garage sale!

To see the first shot I did in this series check out my blog post on light painting. 

Using Light Painting for Dramatic Lighting

Vintage fishing lures light painted with nothing but a small flashlight.

Light painting is an awesome way to create dramatic lighting with no special equipment at all. All I used to to create these photos is a camera, tripod and small Maglite flashlight. Any flashlight will work.

I realized recently the appeal of light painting for me is much like pinhole photography: using the simplest tools to create dramatic photography through light painting. It couldn’t be simpler. But as I always say about pinhole photography- “simple” and “easy” are two very different things.

Vintage fishing lures light painting using nothing but a small flashlight to give dramatic light.
During a long exposure I “paint” the light on the subjects.

Light painting is all about knowing lighting

The secret to light painting, just like any other photograph is all about the lighting. Without great light these photos are nothing more than a fishing lure on an old board. the light brings them alive and gives them depth.

While painting the light on the lures I make many exposures and take a look at the results adjusting a little each time. The amount of time you light a brightly colored lure is less than a darker one. The highlights on the lures are all about the angle of the light. I takes a lot of time and a lot of exposures to perfect the lighting.

You can give the appearance of complex lighting just by the directions of light painted on the subject. A good understanding of lighting helps a great deal too.

It’s like pinholes in that sense too. Sure, most anyone can take a photo with a pinhole camera. But the challenge is to take a good photo with a pinhole. The same is true with light painting. Can you create nice light with a flashlight?

If you just randomly paint from all directions you wind up with too little contrast and a flat boring photo. If you paint from not enough directions you get way too much contrast and shadows which is also an uninteresting photo.

To see more light painting Check out My Other Posts on Light Painting. 

Vintage fishing lures light painting using nothing but a small flashlight to give dramatic light.
the light colored lure on the bottom took about half the time to paint than the top lure.